Over time, metal gutters inevitably develop small flaws from weathering, debris impact, or general wear and tear. While these holes, dents, and rust spots may seem minor, they can compromise the entire gutter system if left unaddressed.
Water allowed to seep through the damaged fascia and soffits causes premature fatigue of hanging accessories and leaves the undersiding vulnerable to rot and mould. Before you know it, minor issues transform into major (and expensive) repairs.
The good news is that minor gutter damages don’t require a full system replacement. Simple patching methods using basic materials can have your rain gutters functioning like new again in no time.
In this guide, we’ll cover the inspection of metal gutters and downspouts for flaws, selecting the right patching supplies, instructions for sealing holes of various sizes, treating rust, and proper finishing. With just a few affordable supplies and some weekend time, you can maintain continuous protection for your home’s exterior.
Identifying the Problem Areas
The first step to patching holes is thoroughly inspecting your gutters and downspouts. Use a ladder to carefully examine the entire run, paying close attention to seams, leaky joints, and surfaces.
Look for signs of rust, dents, or punctures that could allow water to leak through your ceiling instead of draining properly. Gently probe suspect areas with a screwdriver or wire brush to reveal hidden damage below the surface.
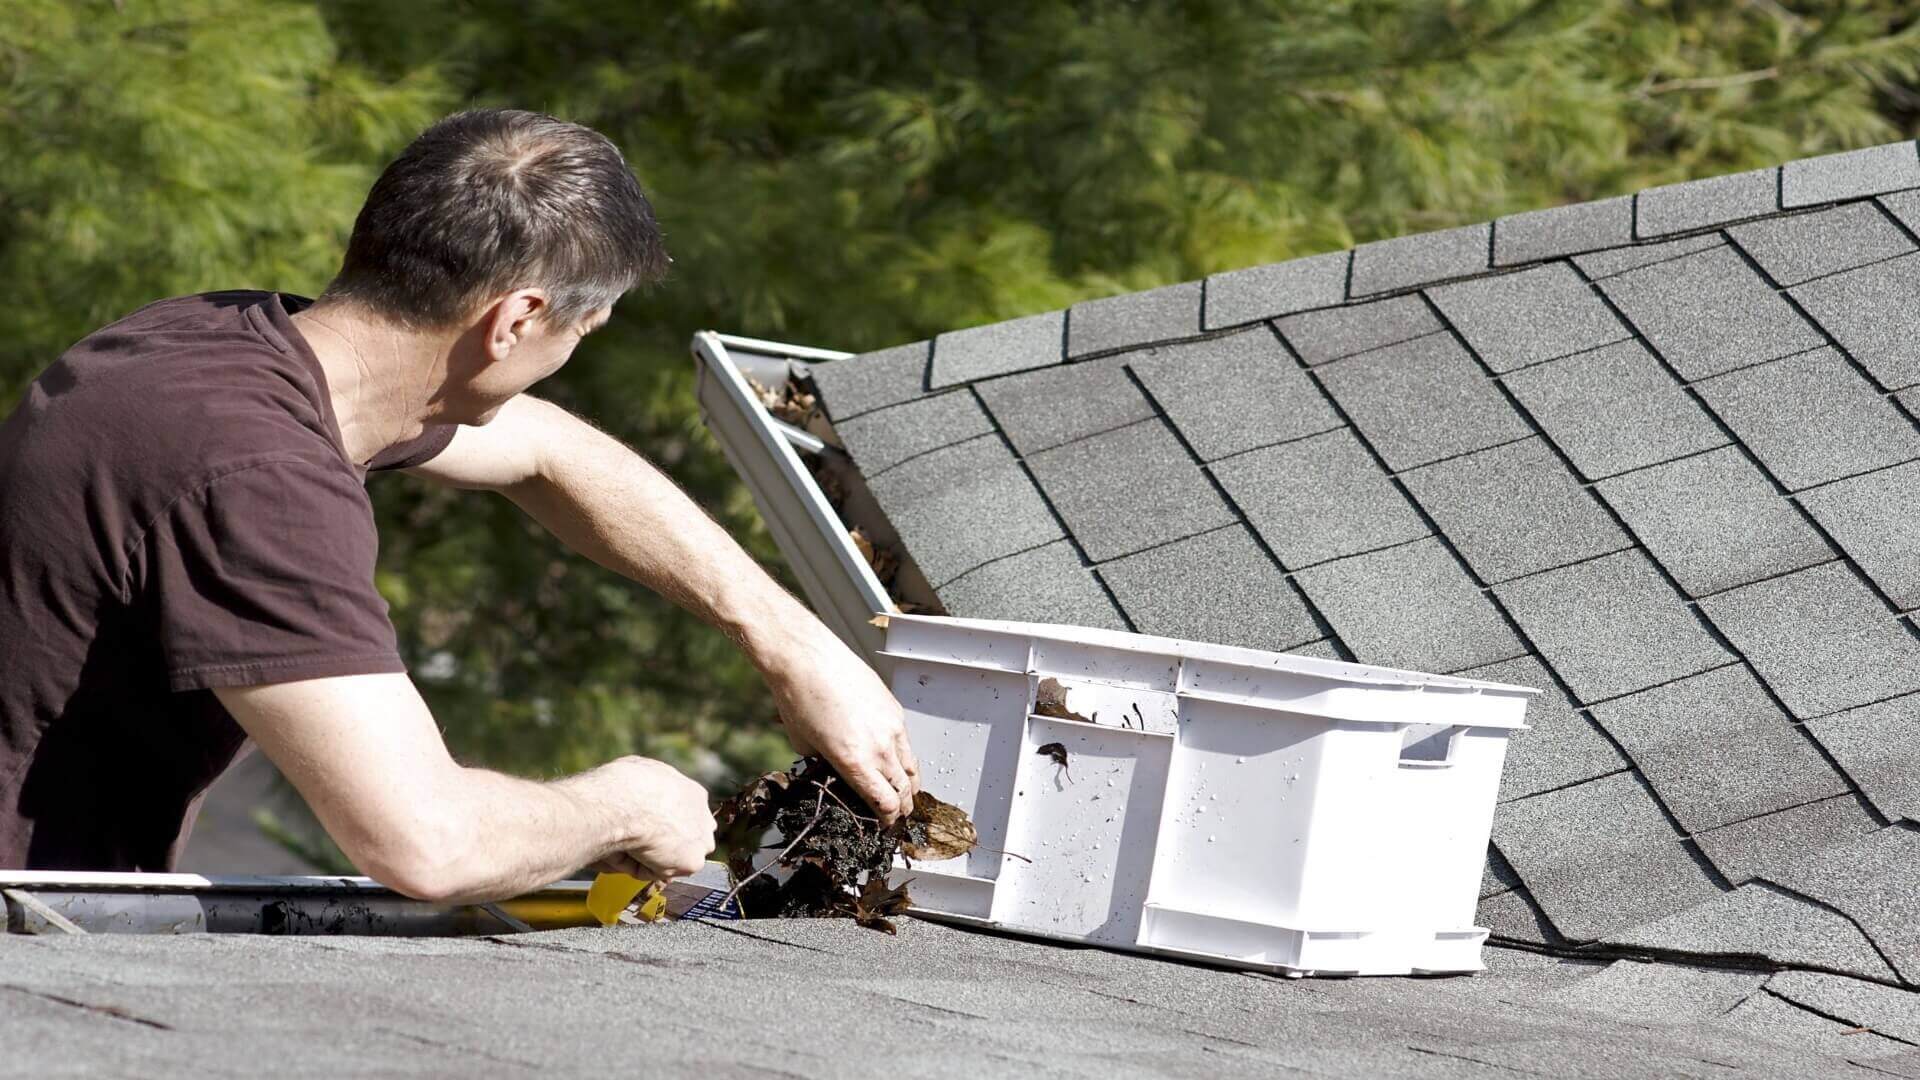
Take note of problem spots and assess whether patches, repairs, or full replacement may be needed. Don’t forget to clear out built-up debris while the system is accessible. Knowing the full scope of issues will help determine the best repair materials and approach.
Materials Needed for Repair
There are a few basic materials you’ll need to have on hand to patch holes in your steel gutters properly: 100% silicone sealant or caulk rated for exterior use, metal patch pieces cut to size, putty or filler compound, primer or paint for finishing, sandpaper or steel wool for prepping surfaces and cleaning solvent.
Consider an assortment of patch sizes to address openings of different dimensions. For minor pits or dents, sealant alone may suffice. Larger holes require a backing patch secured with caulk. Metal patches can also be cut to size and shaped to fit over the gutter hole, then held in place with roofing cement. Rags can be used to clean up any excess roofing cement left over after the repair is completed.
Once the area is completely clean, it’s time to pull out the caulking gun, insert a tube of roofing cement or a repair patch, and gently apply a generous amount around the gutter hole’s edges.
Look for premixed stainless steel putty for filling gaps or sealing seams. Having the right repair materials helps ensure a waterproof, long-lasting bond. Check product specifications to determine the primer, colour paint, or anti-rust treatment suited for your existing gutter material and conditions.
Preparing the Surface
Proper surface preparation is key for patches and sealant to bond to the gutter effectively. Start using a wire brush or scraper to remove any loose rust, dirt or debris from the problem area and about 1-2 inches of the surrounding surface.
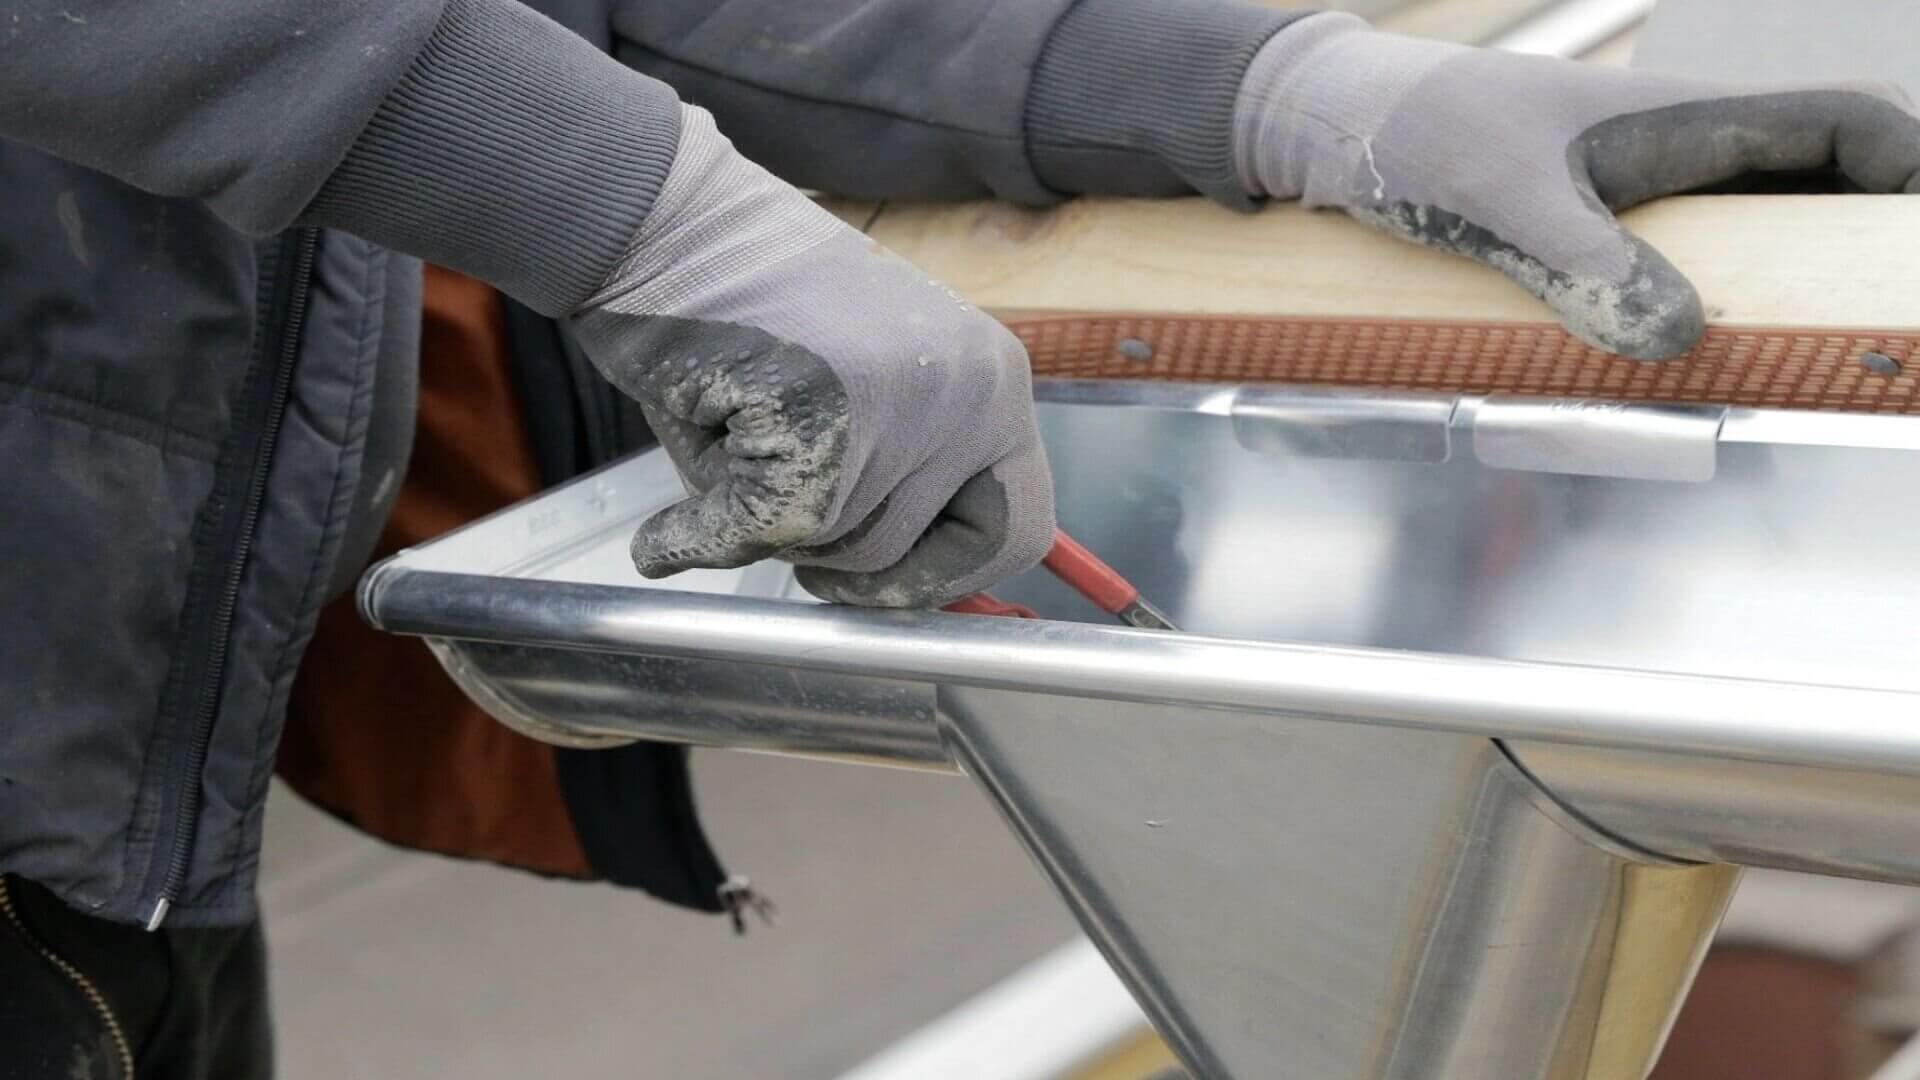
This will give the new materials a clean substrate to adhere to. Next, use a chemical degreaser or solvent like denatured alcohol to wash away grease and contaminants.
Allow to dry fully. Then, rough the surface with 60-80 grit sandpaper. This helps the new materials mechanically bond to the gutter.
Wipe away any dust with a clean rag. Finally, apply primer specifically formulated for your gutter material. This closes pores and promotes adhesion. Allow the primer to cure fully as directed. With a smooth, clean surface, your patches can now bond strongly for long-lasting repairs.
Applying Metal Patches
Metal patches are ideal for repairing larger gutter holes or severe dents in gutters. First, cut a steel or copper patch piece to overlap the damaged area by at least 1/2 inch on all sides.
Sand the patch’s back rough to promote adhesion. Apply a thick, continuous bead of 100% silicone sealant around the entire edge and interior of the hole or dent.
Quickly place the patch centred over the area and press firmly to squeeze out any air bubbles. Use your finger or a putty knife to smooth the sealant into an even layer underneath and around the patch edges.
Ensure the patch is fully seated without gaps that let water pass through. Allow the sealant to cure per the product instructions, typically 24 hours. Then, prep and apply your finishing layer of primer and paint. Once you’ve secured the patch, test it with a garden hose, spraying water into the patched area at different angles.
Sealing Around the Patch
Once the metal patch has been applied, sealing around the edges is important to protect against water incursion. Apply a thick, consistent bead of silicone sealant where the patch meets the existing gutter material.
Smooth it with your finger into a uniform layer, making the sealant "self-feathering" so it tapers at the edges. This ensures water cannot wick up beneath the patch border.
Take special care with inside patch corners, pressing sealant firmly into any crevices. For patches larger than 2 inches, apply sealant in an "H" or "I-bolt" formation, running a thin sealant bead along the centre of each long self-adhesive patch side. This strengthens the waterproof bond. Allow the sealant to cure before any paint or finishing is applied fully. Inspect regularly to ensure optimal protection for years to come.

Finishing Touches
Now that your patches and seals are cured, it’s time for the finishing touches to protect and blend them into the existing gutter. Proper surface preparation and topcoat application will help prolong the life of your repair work.
Sanding and Priming
Lightly sand all patched and surrounding areas to rough them up. Wipe away dust. Apply a high-quality metal primer specifically for gutters. This closes pores and promotes adhesion of your top layer.
Painting or Sealing
Apply at least two finish coats of latex-safe exterior paint for painted gutters, feathering the edges. For unpainted metal, use a rust-inhibiting galvanising sealant. Follow all drying times between coats.
Inspecting Regularly
Periodically check repaired areas for signs of cracking, lifting or rust. These indicate the need for retreatments. Catching issues early prevents costly water damage headaches down the road. With maintenance, your gutters can now functionally last for years to come!
Safety Precautions
Conducting any form of gutter repairs carries a risk of falls and injuries. Before starting this DIY project, take the necessary safety measures:
- Ensure your ladder is secure and positioned on level ground away from doorways.
- For added stability, have someone hold the ladder for you.
- Wear non-slip footwear with rubber soles, and consider using roof brackets or a harness for extra protection when working at heights.
- Keep safety goggles on while scraping, sanding, or using chemical solvents to avoid eye irritation.
- Never lean too far off the ladder; descend and reposition as needed.
- Avoid working on windy days or immediately after heavy rains when surfaces are still slippery.
You can complete your gutter patching tasks safely and prevent accidents by taking a few simple precautions.
When to Replace Versus Repair
Repairing leaky gutters and downspout joints is relatively straightforward and similar to fixing holes. Gutter replacement may be more practical than patching and repairs in some cases of advanced damage or deterioration. Signs it’s time for a full system swap include rusted-through metal over more than half the gutter length, irreparable damage from falls or impacted debris, or gutters that are 20 years old .
Older units may also lack components like leaf guards that improve performance. Additionally, replacement yields long-term protection if gutter leaks persist despite several patches.
Measure the repair costs versus new materials before deciding. Sealants and patches usually provide an affordable solution to restore your drainage system as long as over 75% of your gutters remain intact and functioning properly.
Fix Metal Gutter Imperfections and Restore Performance
With just basic materials and a few hours of your time, patching holes in metal gutters is an achievable DIY project that can safeguard your home’s exterior for years to come. Following the preparation, application, and finishing steps outlined here will result in strong, waterproof repairs for all common issues like rust, dents, and small to large openings. Keeping your gutters and downspouts in good working order through minor maintenance is far more cost-effective than costly damage down the line.
If you find yourself undertaking a complex repair job or full system replacement, consider contacting the experts at A.I Gutter & Roofing. With decades of experience, we can assess your home’s needs and recommend quality products and professional installations. Give us a call to discuss customised gutter solutions and get your drainage system back to optimal performance.
Frequently Asked Questions
What tools will I need to patch gutters?
Scraper or a stiff wire brush to clean surfaces, putty knife or wide blade for filling, primer/paint and brushes, 100% silicone sealant, steel wool pads, a glass of water for mixing putty, hammer, nails or screws for securing patches.
How do I prepare the surface before patching?
Thoroughly clean the area around the hole/dent with a scraper or wire brush to remove any loose rust or debris. Use a solvent or cleaner to degrease the surface, then lightly sand the area with steel wool or sandpaper to rough it up for better adhesion. Wipe away dust.
What type of sealant or caulk works best?
Look for 100% silicone caulk rated for exterior use and intended for roofs/gutters. It should specify waterproofing and have flexibility of /-25% movement. Acrylic or latex caulks may crack more easily over time.
How long until the patch or sealant is dry?
Allow at least 24 hours for silicone caulk/sealant to cure before fully reusing or installing rain gutters. Putty will take 12-24 hours to dry hard. Check product instructions or labels for specific cure times at your temperature.
Should I consider completely replacing the gutters?
If more than 50% is rusted through or severely damaged, water constantly leaks through problem spots, or the gutters are 20 years old, complete replacement is likely needed instead of patching. Rust also accelerates over time.


